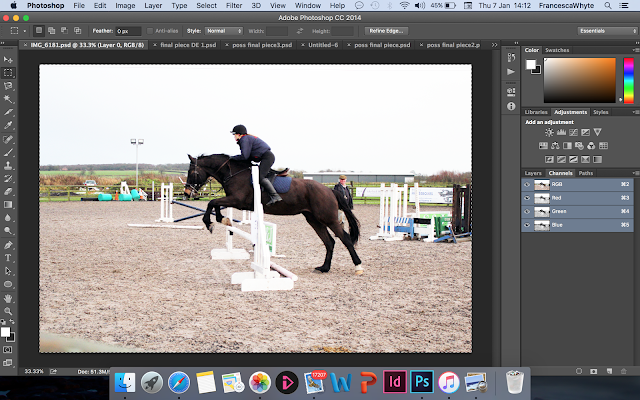
 |
| I started with my first image, I found the channel with the most contrast, which turned out to be the blue channel. |
 |
| I duplicated the layer it by dragging it into the new layer icon. |
 |
| I used levels and moved the light and mid-tone sliders towards the right to dramatically darken the image |
 |
| I then set up a brush with a hard tip to just fill in any remaining highlights |
 |
| I clicked on the RGB channel and then command and clicked the blue copy channel to load the selection |
 |
| Next I inverted the image. |
 |
| I copied and pasted in my landscape photo into my photoshop document. |
 |
| I command and clicked the portrait image and applied a layer mask. |
 |
| I unlocked the mask with the layer by clicking the chain icon |
 |
| I later went to transform, and scale to move the photo to the right position. |
 |
| I then selected the portrait layer and clicked command J to duplicated it. |
 |
| Finally I desaturated the copy and changed the blending mode to multiply. |
 |
| This is my final piece. |
Contact Sheets |
 |


Interesting ideas here however they need some polish. Look again at the results that you are trying to emulate. Your final images have a very clean cut out around the subject, the ones from the artist have a background, think about adding this.
ReplyDeleteAlso, I don't see enough contact sheets for the images that you have used. For example, your image of the girl does not have any contact sheets of a shoot. The amount of contact sheets for the horse are ok but could be more for a target grade like yours. Last thing is that screen shots are not contact sheets.